

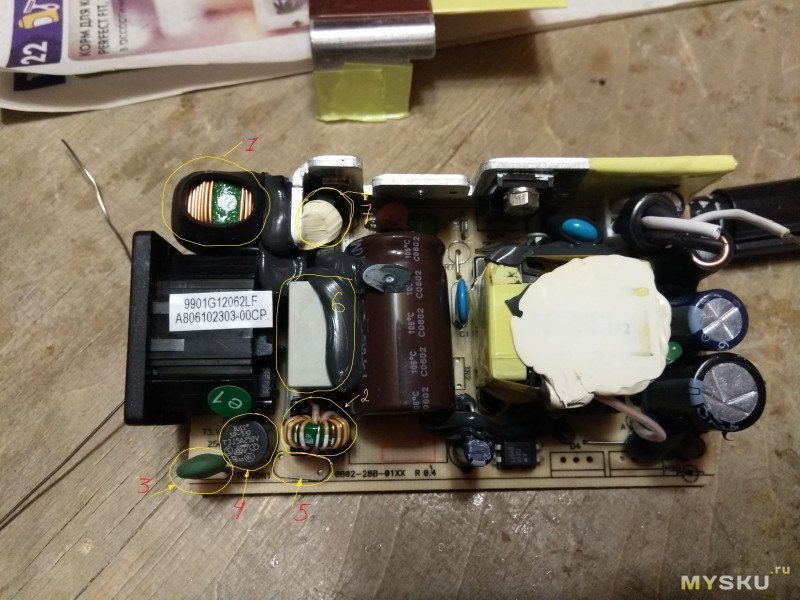
The new PSU already has one diode assembly. And this PSU is already a little different from the previous one. Number 7 (under white sealant) — diode bridge 2KBP06M (2A/600V). Number 3 – SCK033 thermistor. Today we will look at the junior PSU 12V / 5A, model LSE9901B1260. One diode assembly is installed, but already at 100V / 30A. We see a large, standard "computer" connector, a common mode choke and an X-capacitor. There was already health for the soldering iron. A thermal pad is glued to the transformer. Number 5 – a place for a varistor (10471).
Power supply 12V-5A.
 The store also has a 12V-5A power supply unit with cables. I had to quickly change the capacitor, but they just didn’t find the right Rubicon and installed an LTEC 16V / 1000uF capacitor, a good LZG series – DATASHIT.
The numbers 1 and 2 are common mode chokes. On the top cover there is a hole for the LED. In this case, the base of the additional third radiator interferes. And I have not seen these PSUs in the store yet. Now it is clear why they changed the diameter of one capacitor at the output (from 12.5mm to 10mm). This review may contain technical and grammatical errors. At the same time, the model on the label remained the same. Let’s try to understand the meaning of the changes on the board. It is sad that their output cables are bitten off and it is very likely that when replacing equipment, they were simply bitten off and even too lazy to pull them out of the connectors. On the reverse side of the board there is a textolite overlay to which the upper shielding gasket is glued and two contacts are soldered. Over time, the revision of the board changed. And to me, on the contrary, transistors from Toshiba very often come across in these used PSUs (in the same VeriFone 9V-4A PSUs). Near the current resistor in the primary circuit, the resistance is 0.36 ohms. Looked at available details. There are 16AWG cables from these VeriFone 9V-4A PSUs at home. But below the label there is a marking of another revision. We preliminarily inspect the board – we have two main radiators and a third radiator with a tail has been added between them. Number 4 – round fuse 3.15A.
Since this is the case and one new PSU was faulty, then I began further analysis from it. Changed capacitors (diameters) – now one per
12.5/20mm and another at 10/20mm. But there was a hitch with the BP, there was no price for them. PSU size (body) – 110x64x33mm. at BP,
at the output, rounding is done and this is very correct. Let’s move on to the hero of the review. YXG Series – DATASHIT.
We unstick from the transformer and unscrew the third, additional, radiator. I read several times in the comments when people said that Schottky diodes are installed with almost no current margin. A couple of VeriFone models have thick long cables at the output. The pins are isolated for safety. Immediately after the New Year there was no health and mood for the soldering iron. We look at the power supply board, after parsing the case. Key transistor K2843 (600V / 10A, Rds (on) – 0.75 Ohm) – DATASHIT. Kirich in a recent review said that Toshiba transistors have not been seen for a long time. I chose two more of these PSUs 12V-5A in the package. With the old capacitor, this ring did not fit. Most PSUs make a straight bevel and in some cases this creates problems for the output wires inside the case. Immediately solder the radiator with the diode assembly. Let’s run through the elements on the front side of the board (at the input).
On the same evening, I opened the case of the PSU. I ordered some small things and chose two PSUs from the package – one for 12V / 6.67A and the other for 12V / 5A. The wires are inserted into a separating plastic case, but the wires themselves were soldered to the board. The only question is how effective the yellow transformer tape is as a thermal interface. Remove the textolite overlay from the bottom of the board and peel off the shielding gasket. Although there were doubts, but not about the BP. A ferrite ring was installed on the wires, right inside the case.
In my case, this PSU is in used condition. I put two boards for a visual comparison. The second large PSU has also already looked at home and in the second photo it is already soldered with the remnants of the wires and after the revision.
When checking, in the store, the LED on one PSU did not light up, the PSU turned out to be a gift. I slowed down with this PSU, opened the case using the “big knife hammer” method. A little background – on the evening of December 30, I went to our city RADIO STORE. They are quite simply converted to 12V. DATASHIT specifically for this assembly, immediately, did not find it. On Thursday, I decided to take a walk to the store and, if possible, take a couple more power supplies. Just in case, we call the diode assembly, in my case, everything is in order with it. This is in the subject when they sometimes say that it is not necessary to disassemble and the analysis has already been in such and such a review for a long time. And there were a lot of them in boxes in the store. The inner world is changing, while for Chinese products it can change dramatically and at any moment. Otherwise, there will be problems at home, there is nowhere to put them. 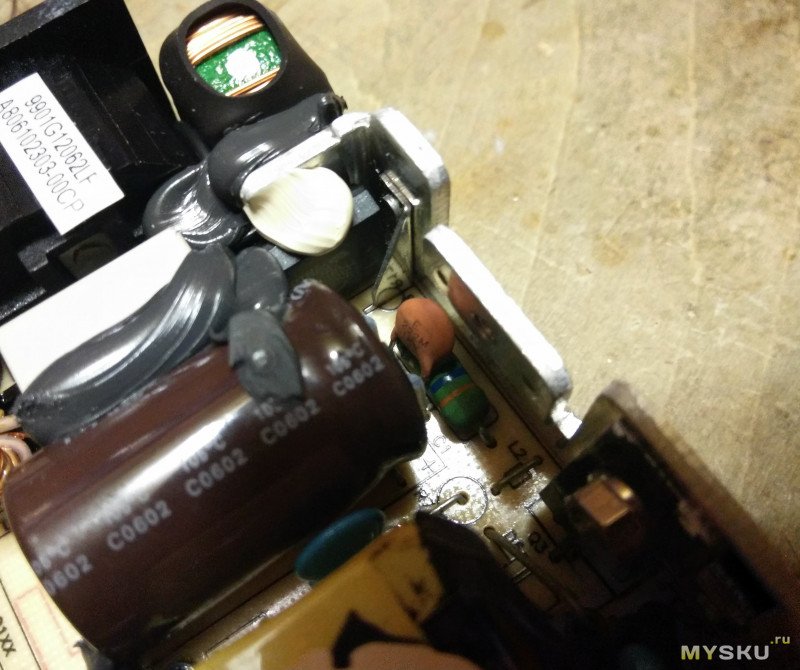
On the labels you can see what was the connector on the native cable and its pinout. I have no questions, normal solution. There are very big people here in terms of BP, but I will tell from my own, small and amateur bell tower. The shielding gasket has changed. In the evening, I dismantled the case from a non-working PSU. Especially, for sporting interest, I took all VeriFone 9V-4A models. This is the topic of Schottky diodes in the PSU. Optocoupler 817C. Small capacitor for PWM power 50V/10uF. I have the opposite observation – in factory power supplies, these Schottky diodes are installed with a large current margin. Temporarily postponed BP. You can safely take this home. They just asked, on the next visit to the store, to say it’s trash or normal PSUs.
View from the end, at the entrance. Our PSU is on two screws under the rubber bands, a couple of latches from the entrance side. Unsolder all pins and wires. One contact is from the minus at the output, the other from the ground contact of the 230V input connector. Next is a good filtering inductor in heat shrink and a small capacitor (25V/100uF). They have a relatively high price and if there are branded used VeriFone 9V-4A power supplies in the store, at a price of 199 rubles (less than $ 3), it did not make much sense to take a 12V power supply. In short, I went to the store, said that the PSU was in order and it was not garbage at all. On the radiator we already have two STPS20H100CT diode assemblies (for 20A / 100V each, metal case) – DATASHIT. A red disc capacitor 222/1kV is installed in parallel. Diode assembly F30JC10, my favorite (by me) ferrite beads are installed on the extreme terminals. Made for extra security. There is a Y-capacitor, it is also in heat shrink. On the front side there is an insulating gasket with a wide copper tape. Then we solder the remains of the output wires and check if the short circuit is gone or not. We decided that since the New Year and I often go to the store, the BP is a gift. Even in the store I looked that the PSU was on screws, but I forgot it at home, my head was already busy with the New Year.
There are two Rubycon 25V/1000uF (12.5/20mm) capacitors at the output. Old revision on the left, new revision on the right. Marking from below, well sealed on both sides, I decided not to touch it. Power 1 W. There I saw a package with a used 12V PSU. 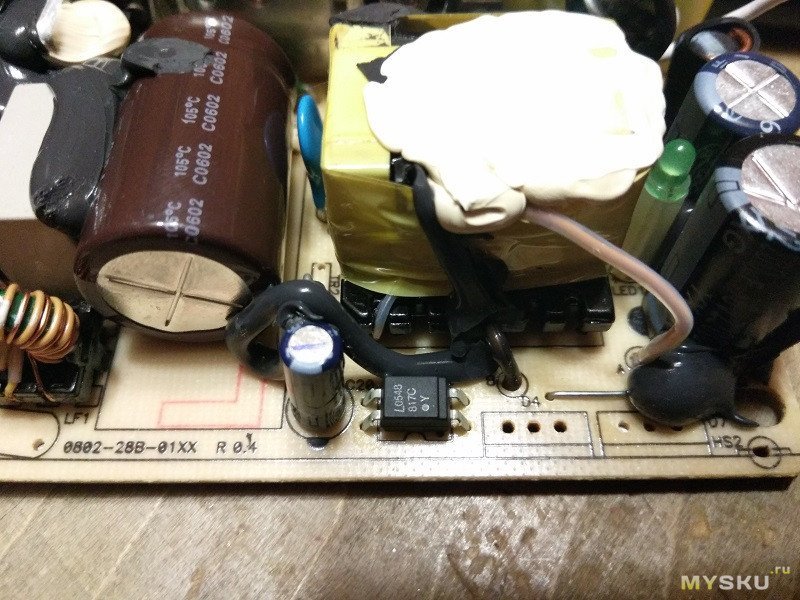 They agreed on the price as for a used PSU VeriFone 9V-4A (199 rubles). But these output cables are indifferent to me, I have at home both home-made cables and factory cables up to 16AWG (2×1.31mm2), with ferrite filters on them. On the first PSU, there is no such ring on the wires.
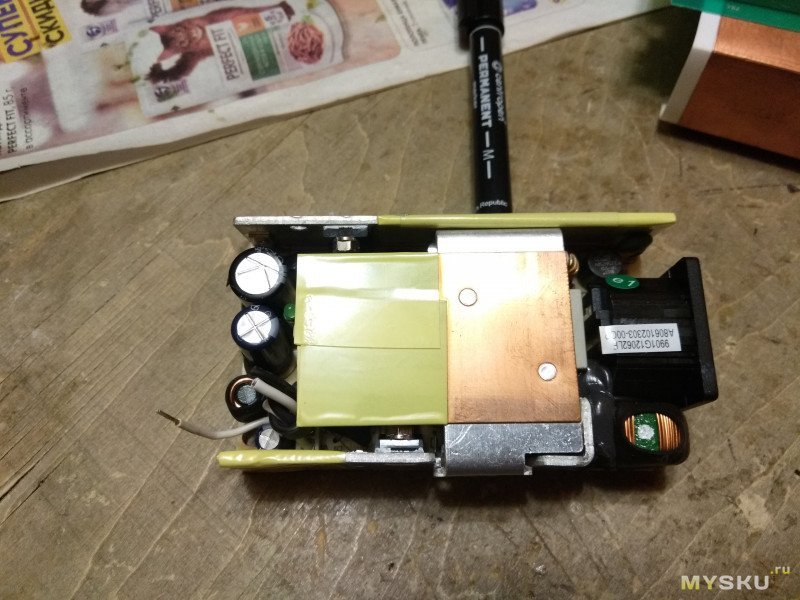
 After soldering the wires, the short circuit at the output disappeared. Nippon Chemi-Con high voltage capacitor. I was not very surprised, I saw this in the VeriFone 9V-4A PSU.
The entrance part has changed a little. A small, very amateur review of a good 12V-5A PSU. The copper tail is riveted to the third radiator and the tail itself is glued to the transformer, to the white sealant. Number 6 – X-capacitor. The photo is enlarged. In appearance and visually accessible details, for myself, I made certain conclusions about the BP. After opening the case, it became clear that a soldering iron was needed for further disassembly. The multimeter showed 108-109uF, size 18/31mm. The result – a large number of accumulated at home, I had to quickly distribute to friends and in the yard. It was only in the fall that I raked a little at home with a used VeriFone 9V-4A PSU. At first it seemed that the output wires were installed on the connector.